
Designing a menu board
ProThe Menu widget on a sign sets the look: columns, fonts, colours, photos, prices and how sold out shows.
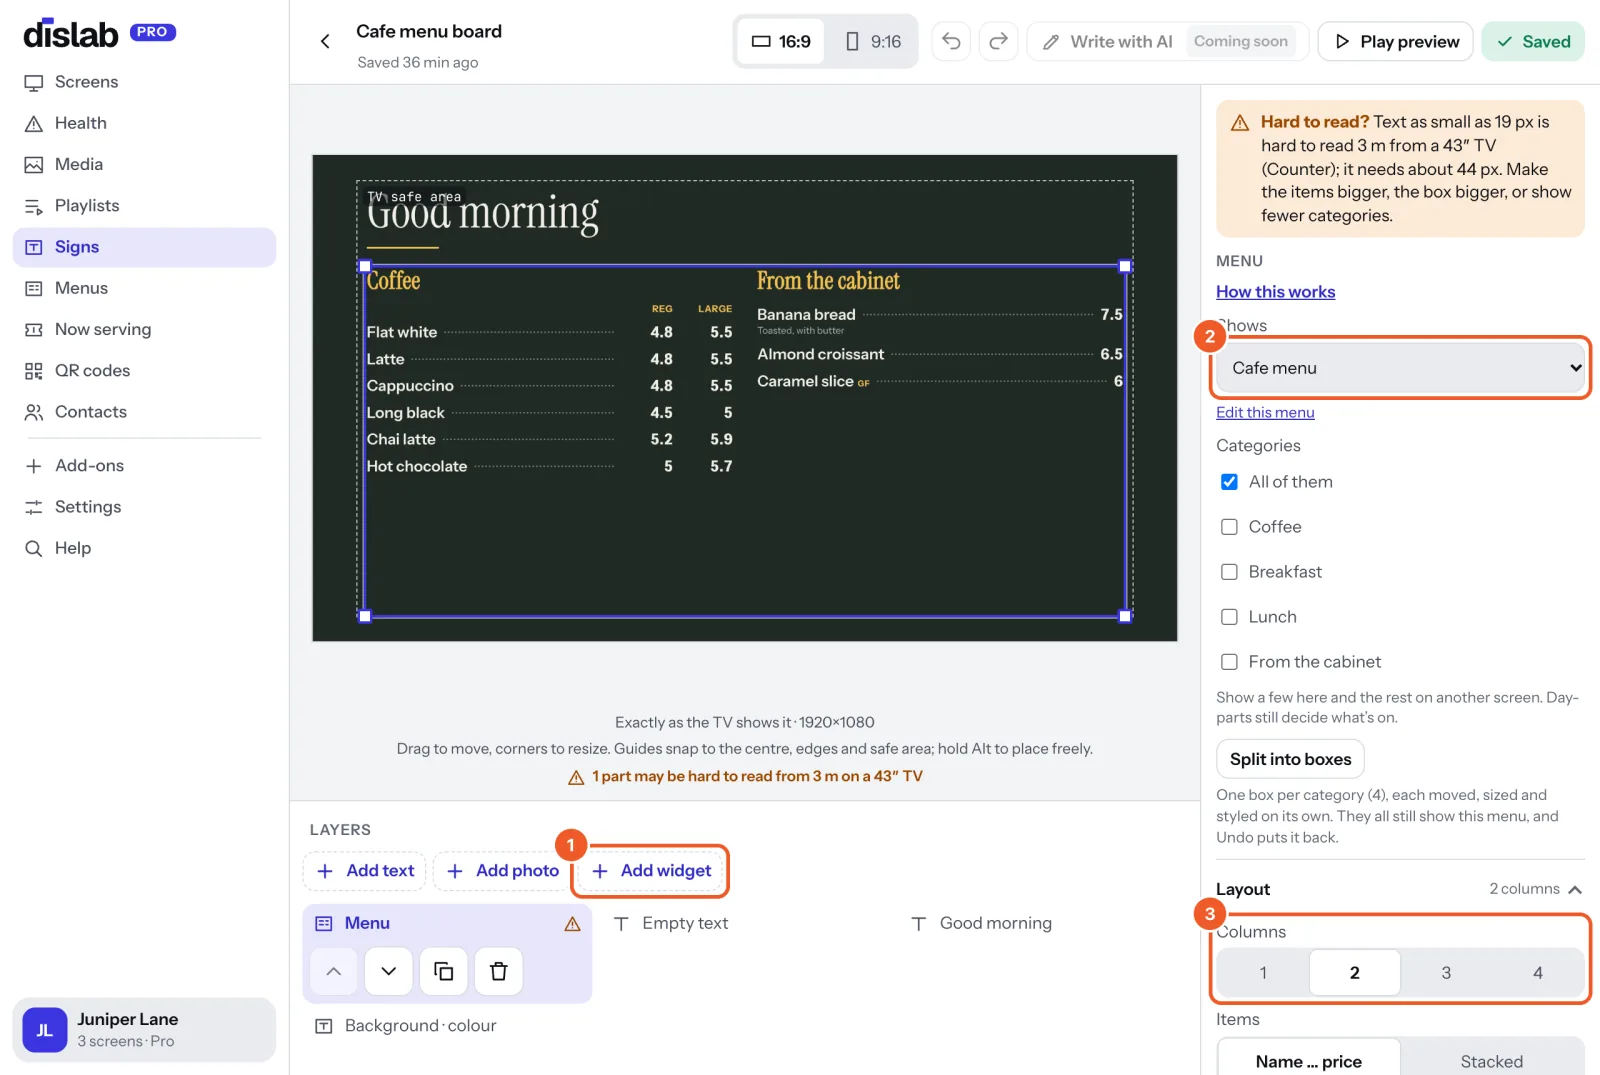
- Start from a menu template on Signs (it asks which menu, or makes one with sample items), or open a sign and press Add widget › Menu and choose the menu.
- Select the Menu layer. Shows picks the menu; Edit this menu opens it. Under Categories, untick some to show only those here and the rest on another screen.
- Set the layout: Columns (1 to 4), Items as Name … price on one line or Stacked, and what goes Between name and price (dots, a line or space).
- Photos: None, Small beside each item, or Cards. Items need a photo in the menu for this to show.
- Prices: with the currency sign ($5.50), without it (5.50), or short (5.5).
- Fonts and sizes: Font, Heading font, Item size and Heading size. These are the largest sizes; a long menu shrinks to fit, down to 60%.
- Colours: Text, Descriptions, Headings and tags, and if you like Own price colour, a Background, a Panel behind each category or Headings on a band. Switches below set capitals, centred headings and lines.
- Sold-out items: Crossed out (with your own Sold-out words) or Taken off the board.
One category’s own look: choose a category to give it its own font, sizes and colours, or a panel behind it, so specials stand out. Back to the menu’s look undoes it.
Split into boxes: one box per category, each moved, sized and styled on its own, so Coffee can sit in a tall box on the left and Breakfast across the top. They all still show the same menu; Undo puts it back.
The look is saved with the sign, not the menu, so the same menu can look different on two boards.
Thanks for telling us. If something’s missing, tell us what and we’ll add it.
Still stuck?
Email support@dislab.app, or send us a message. If it’s about a screen, tell us its name. We answer within one business day.