
Making a menu
ProKeep your categories, items, sizes and prices in one menu; screens show it once you publish.
A menu holds your items and prices. A sign shows it with a Menu widget, so one menu can be on several boards, and a price changed once changes on all of them.
- Open Menus, type a name (“Cafe menu”) and press Make menu. The menu opens with one empty category.
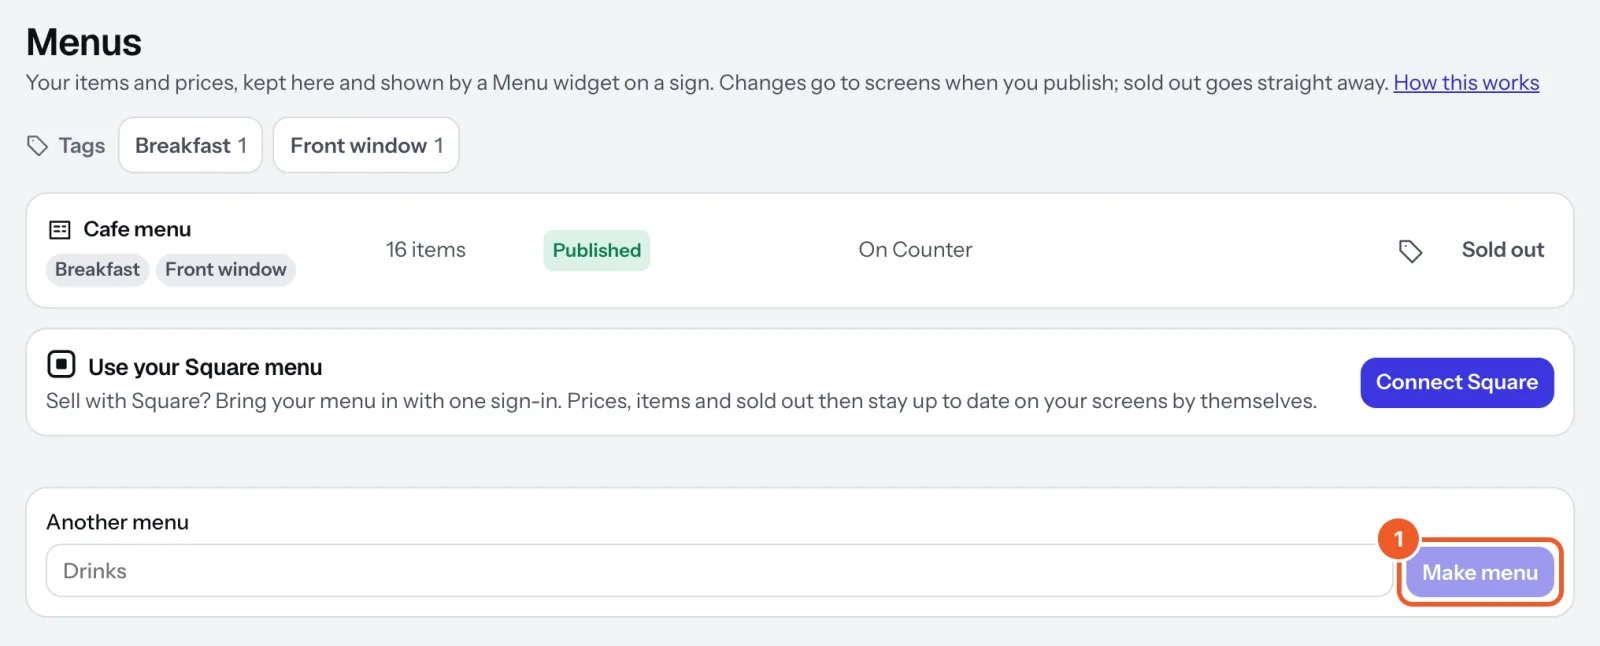
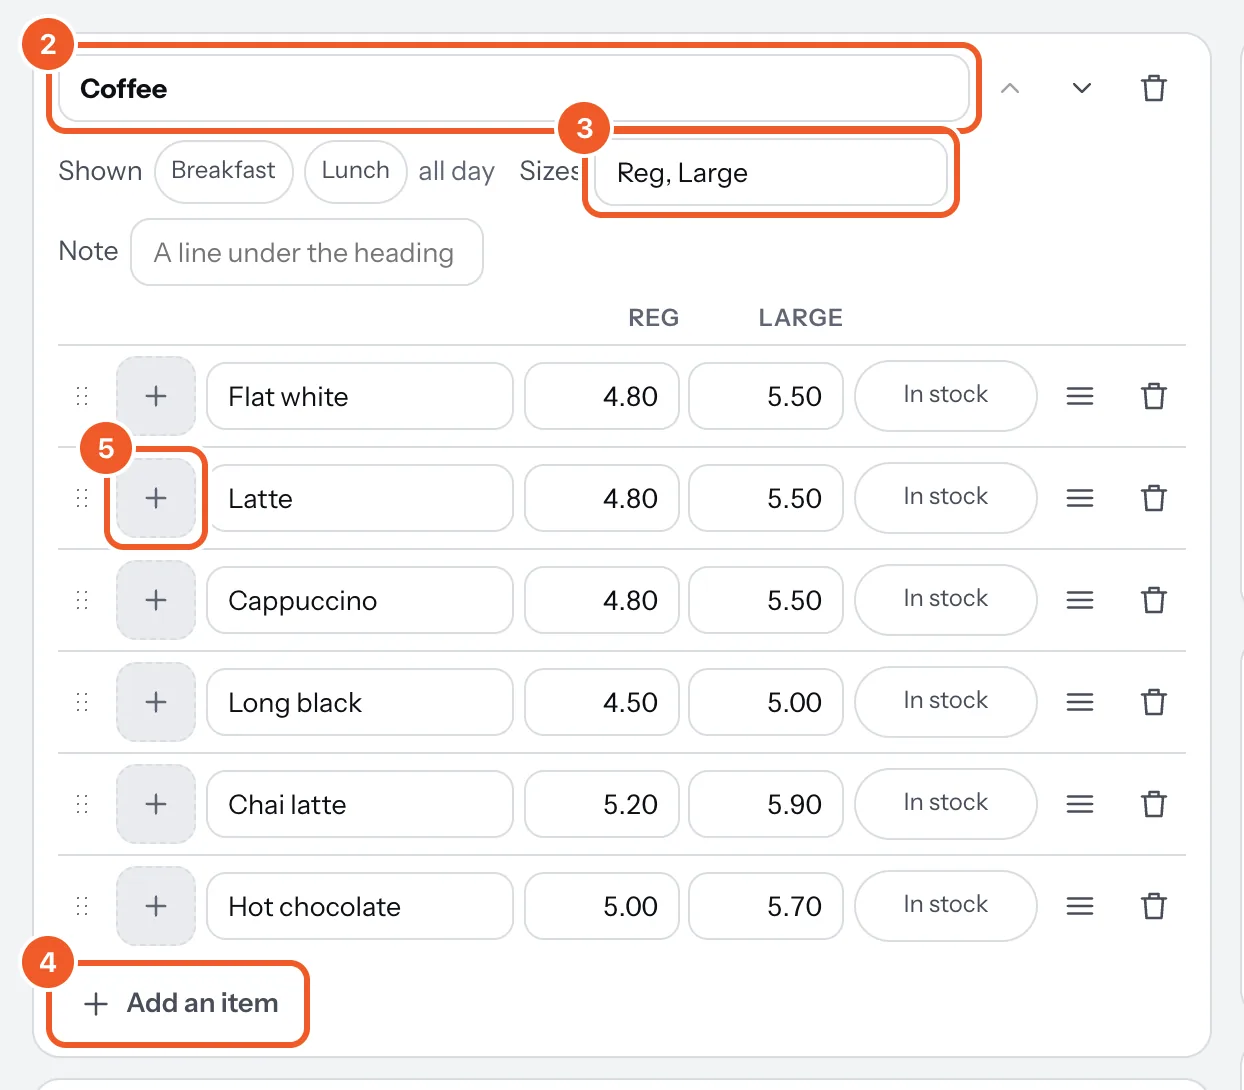
- Name the category (Coffee, Breakfast). Add a category at the bottom adds the next one; the arrows beside a name move it up or down.
- If the category comes in sizes, type them in Sizes with commas between (Small, Large), up to four. Each item then gets a price per size. Note is a line under the heading, such as “Oat milk 50c extra”.
- Type each item’s name and price. Add an item adds another; drag the dots on the left to put items in order, or press the bin to delete one.
- For a photo, press the square with a plus beside the item and pick one from your Media (or upload it there).
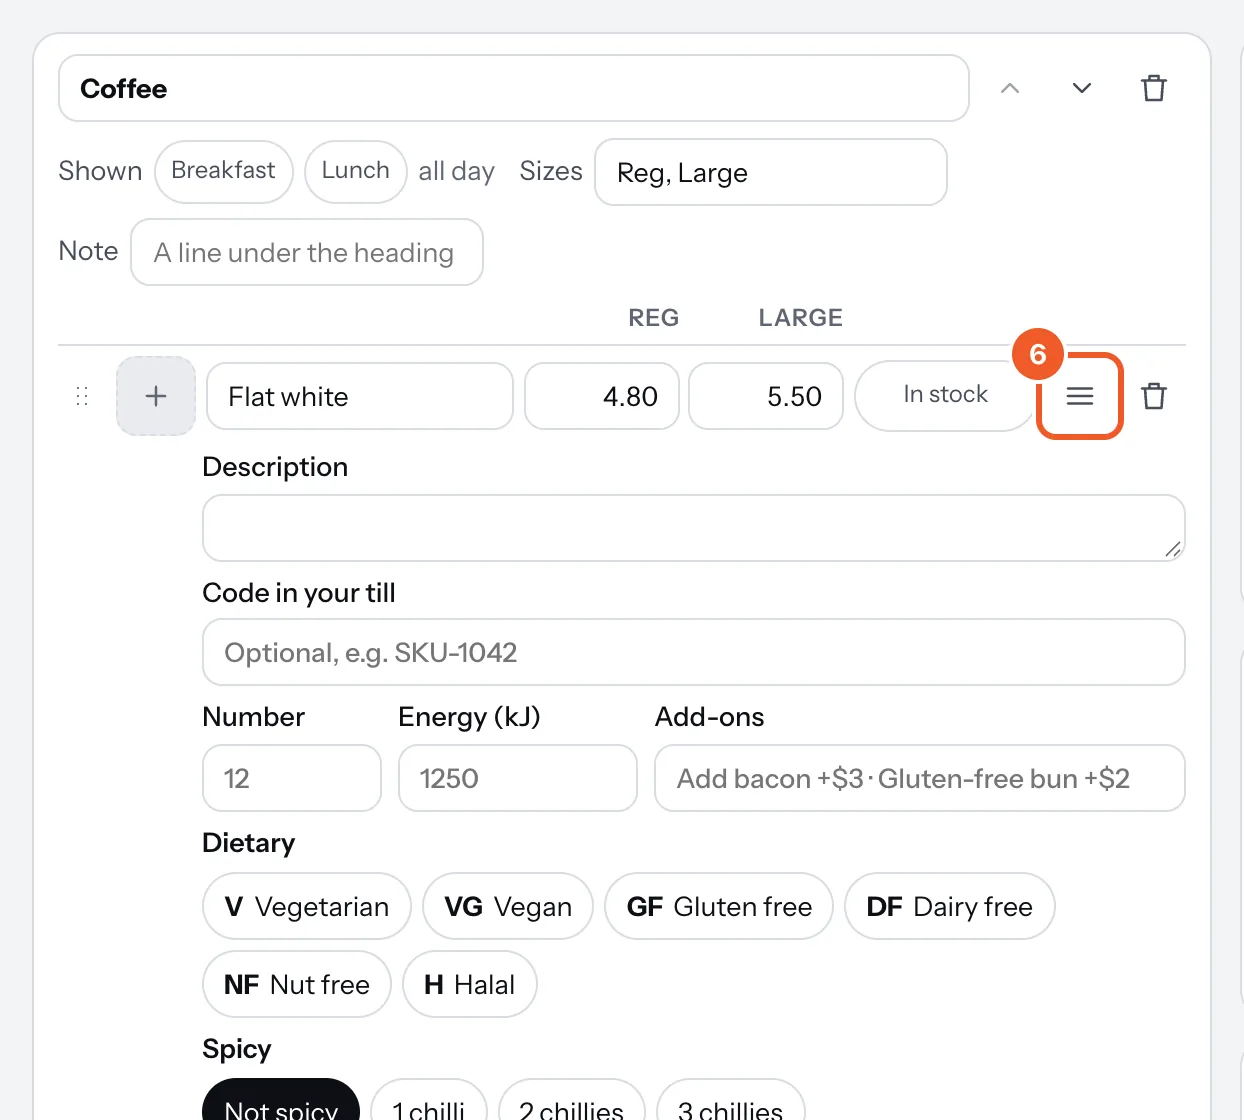
- The three-line button beside an item opens its Description, Code in your till (only for prices from your till) and Tags such as GF, V or NEW, up to six.
- On the Settings tab, check Prices in: the currency the board shows.
- Save keeps your changes without sending them to screens. Leave the page with changes unsaved and Dislab asks first.
- Publish sends the menu to every screen showing it, within a few seconds.

To show it on a screen, put it on a sign with a Menu widget, or start from a menu template on Signs (see Designing a menu board), then put that sign on the screen. On screens in the editor lists where it shows now, and Preview shows your changes on the first sign that uses it.
- Changes wait for Publish: names, prices, photos, day-parts and markdowns. Sold out doesn’t wait (Sold out).
- Throw away changes (under the menu’s name, once it has been published) goes back to what screens show now.
- Too long to publish: a long menu shrinks to fit its box, down to 60% of its size. Past that it won’t publish and says which sign it doesn’t fit; make the box bigger, add a column, or show fewer categories there. Or set the Menu widget’s Long menus to Pages: the menu stays at its size and shows as pages that change by themselves, every screen on the same page.
- Changed somewhere else: if your till or another person changed the menu while you had it open, Save doesn’t overwrite it. Press Reload the menu and make your change again.
- Delete this menu is at the bottom right. Signs that showed it are left with an empty menu until you choose another.
- Sorting your menus: the tag beside a menu in Menus opens Name and tags. Tag menus (Breakfast, Bar, Front window), then pick a tag above the list to see only those. These tags only sort your menus; screens never show them (an item’s own Tags, like NEW, are what boards show).
Staff who only mark sold out don’t need your login: invite them as Staff (People in your account).
Thanks for telling us. If something’s missing, tell us what and we’ll add it.
Still stuck?
Email support@dislab.app, or send us a message. If it’s about a screen, tell us its name. We answer within one business day.