
Designing a sign
Every planText, photos and widgets laid out in your browser, drawn by the TV exactly as you see them.
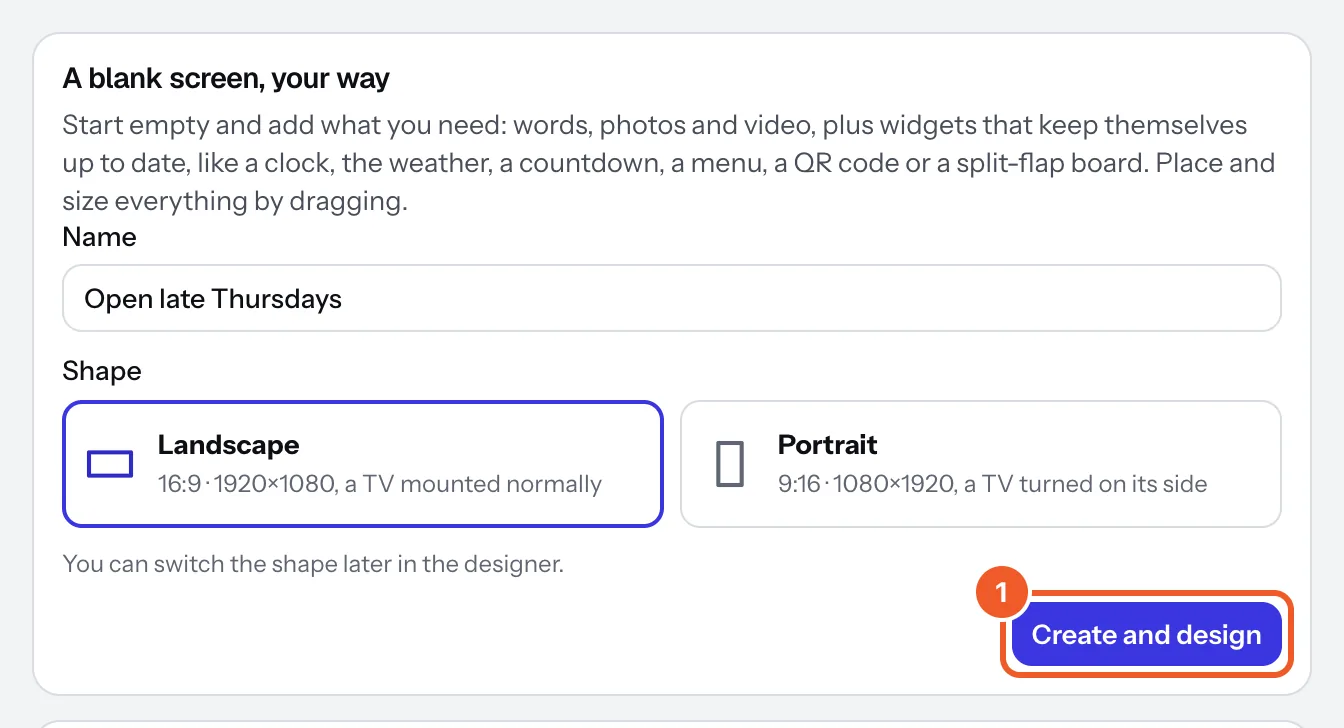
- Open Signs and choose From scratch (or start from one of the templates). Type a name, choose Landscape or Portrait (you can switch later) and press Create and design.
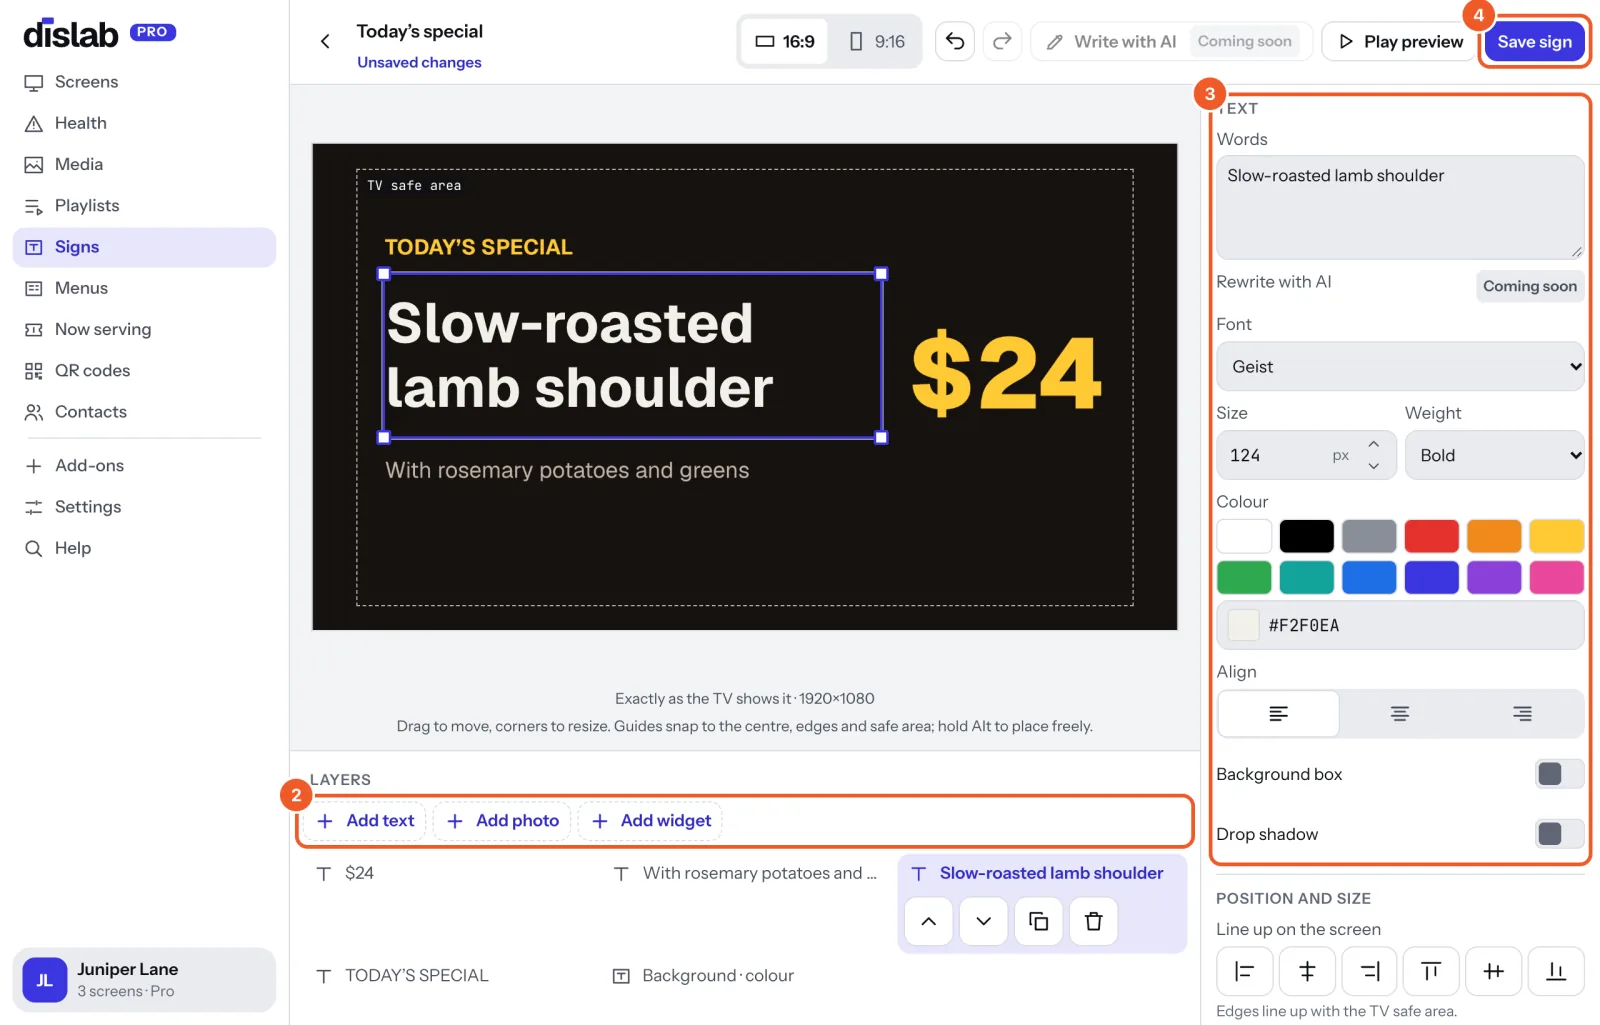
- Press Add text, Add photo or Add widget under Layers. Each one lands in the middle of the sign.
- Drag it where you want it and pull a corner to resize it (moving and sizing). Select anything to change it on the right: text, photos and the background, widgets, and how each one comes in (Entrance).
- Press Save sign (or Ctrl or Command S). When everything is saved the button says Saved.
- Put it on a screen: putting a sign on a screen.
What you see is exactly what the TV shows, at 1920×1080 (or 1080×1920 upright). The dashed line is the TV safe area: keep words inside it, as some TVs cut off the edges. Screens showing the sign change within seconds of saving. If you leave with unsaved changes, Dislab asks first.
On Free, a sign can have text, photos, videos, clocks, weather and QR codes; other widgets are marked Pro. If your screens show the “Powered by dislab.app” badge, keep the dashed box in the bottom-right corner clear: the badge goes on top of it.
Thanks for telling us. If something’s missing, tell us what and we’ll add it.
Still stuck?
Email support@dislab.app, or send us a message. If it’s about a screen, tell us its name. We answer within one business day.